
What to Expect When Hiring a Professional Exterior Painter


Hiring a professional painter can be overwhelming, as it can be difficult navigating differences in quotes, scope of work, and companies. Most articles on this topic will tell you to make sure you get three quotes, check reviews, and make sure your painter is insured. Although that's good advice, we intend to actually tell you exactly what happens when you choose a professional exterior painter to paint your home.
With over 15+ years in the painting industry as a small, local and family-owned business, we have dedicated ourselves to customer satisfaction. Our top priorities are communication and respect for our clients. Here is what our process looks like from the moment you reach out to us, to the moment we leave your driveway for the last time.
In Short - What to Expect When Hiring a Professional Exterior Painter
Here's what hiring a professional painter should get you:
An in-person consultation where they go over your space (this includes measuring and assessing the condition of the areas to be painted, as each painting scope can vary wildly depending on the condition of surfaces)
Someone who is insured, has a warranty or guarantee, and is WSIB compliant. If hiring for heights work, they are required to be Working at Heights certified. (This is specific to Ontario - it may vary depending where you live.)
High quality materials included in the proposal price - this includes the paint and any brushes, rollers, poly sheets, etc.
Communication regarding timeline and when they will be there to perform the work
A walkthrough afterwards to ensure everything was done to standard
We'll go in depth regarding exactly what to expect when you hire a professional exterior painter.
Reaching Out to a Painter
Reaching out should be easy!
You can contact us by phone, email, or by using our online booking form. Our booking form details what you need help with, what time and dates work for you for an appointment, and what your ideal project timeline looks like.
All it takes is 5 minutes to fill out the form, and within 20-30 minutes you'll receive a reply back, confirming your appointment time. At any point, our clients can choose to respond to this reply asking any questions beforehand.
Your Consultation & Quote
During your consultation, we'll assess your space and talk about what you're looking to have done - we're looking at more than just square footage here. Measurements and photos will be taken to ensure an accurate estimate, and we'll assess the condition of areas like your siding, trim, and any possible problem areas (like peeling, rot, or previous paint failures).
We'll provide you with the recommended approach and how to best achieve the look you're after.
Testing for Oil Paint
Each consultation, we bring isopropyl alcohol and cotton rounds to conduct oil paint testing. If you take the isopropyl alcohol on a cotton round and can scrub off paint, it's latex (water) based. If nothing comes off, it's oil-based.
Oil-based paints require proper prep before they can be painted over with latex, as water and oil don't mix. This means using an oil primer beforehand.
We test the paint every time to ensure we don't paint latex over oil, as this mistake is incredibly costly to make. When painting latex over oil, it's not a matter of if the job will fail, it's a matter of when. The paint will likely appear chalky and begin peeling or alligatoring in areas, as the latex paint will not be able to adhere to the oil paint.
A home where in the previous application of paint, they did not oil prime beforehand, which resulted in the entire house needing to be repainted and repaired.
In order to fix something like this, it requires a thorough scraping and sanding back to remove any failing finish. Afterwards, the entire surface must be sanded to smooth down any edges and to scuff up the surface before painting. An oil primer has to be applied afterwards, then you can proceed with latex paint.
Finish Levels
Typically, we provide 3 finish tiers for our clients, in order for them to best understand the work involved in each, and the end result. During the consultation, we discuss what finish you're after and what's involved in achieving it.
Silver - A solid, professional finish. We fix obvious imperfections (screw holes, major cracks and dents), but don't do extensive prep beyond what's required for a lasting job. (This is important: no matter what, we never cut corners.)
Gold - An above-average finish. We fix anything visible from normal viewing distance, so the result is smooth, even, and consistent. This is what most homeowners choose, as it is the perfect balance of improving your home while remaining economical.
Diamond - A designer-level finish. Every surface is meticulously prepped and sanded smooth. Depending on the house, this can mean 20+ hours of prep before even a drop of paint goes on, but the result is absolutely stunning from every angle and every light.
Depending on the job, we can offer pricing options for each finish. Each homeowner has a different preference, so it's important to us to provide options that suit their budget and finish preference.
Your Quote
A common question we get is how to prepare your home's exterior for painting, which is why we provide a general expectations summary with each quote. This helps answer any frequently asked questions and sets expectations from the start, so you aren't left wondering what you do or don't need to do before having a professional painter over.

For the actual scope of work, each quote is broken down with individual line items for each area. Measurements are entered and the scope of work is detailed thoroughly. This includes the prep work required, number of coats being done, and the type of paint we are using. Material and labor cost are kept separate in our quotes.

Your home is one of the most valuable assets you can own, so we know just how important it is to get things right. To make sure everyone is on the same page, we prioritize quotes that are transparent and easy to understand exactly what type of work we will be doing.
Our quotes also include our payment process, our warranty information, Working at Heights certification, and our insurance.
Prep Work: Where the Real Work Happens
This is the part that homeowners tend to underestimate the most. A good exterior paint job can be up to 60-70% prep, and 30-40% painting. Depending on the condition of your home, what type of project you're looking for, and the finish level you're after, prep can include:

Trenching: Dirt can often cover the area to be painted, like siding, so it's important to dig away any dirt that is covering the area to ensure full coverage. Trenching can also help prevent buildup of moisture near your siding.
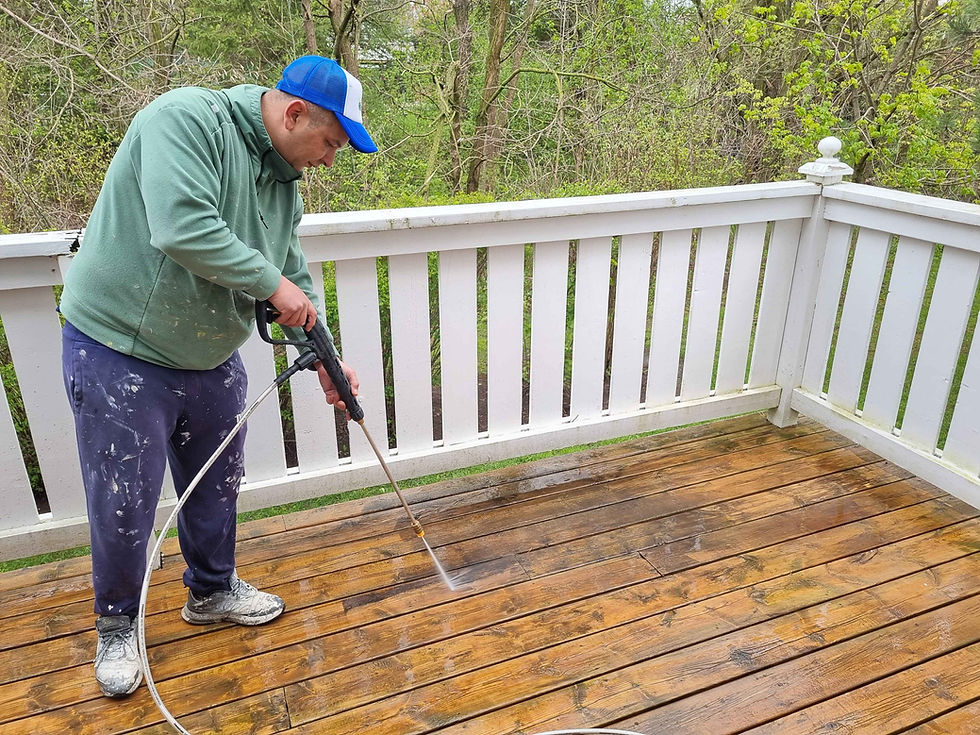
Pressure washing to remove dirt, mildew, and chalking (common on siding and deck projects)

Scraping and sanding failing paint back to a sound, stable surface (if the paint is peeling, usually from moisture)
Caulking gaps around windows, doors, and trim joints
Minor repairing of damaged or rotted wood (using wood hardener and wood putty)
Rust treatment - this can include sanding down to bare metal and applying a rust-inhibiting primer
Priming bare or repaired areas
During your consultation, we take the time to talk about what prep work will be required, and in your proposal the type of prep work will be clearly outlined in the scope of work.
Materials - What We Use and Why
We typically use paints from Cloverdale Paint, which is a Canadian family-owned paint company that manufactures their paint in Canada. As a family-owned small business ourselves, it's important to support a company that shares similar ideals to us and choosing to support Canadian.
We use low and zero-VOC products wherever possible. From Cloverdale, that is their Ecologic product line, which is fantastic in both interior and exterior settings. Our painters prefer it to any other paint on the market for its application.
If a client has a preference on the product we use, we are happy to use that product instead.
Timeline and Weather
Exterior painting in our Ontario climate is seasonal, and weather is the single biggest variable in scheduling. Humidity, rain, heat waves, and air quality warnings due to forest fires are all real issues we have been facing each summer in Ontario when scheduling exterior work.
On our intake form, we provide an option for putting down the desired timeline of your project. When it comes to exterior work, there is a limited timeframe that people can have the work done: generally May through September, before the temperatures get too cold. It's important to know the timeframe our clients want their project completed by, in order to best serve them.
Rain, high humidity, temperature swings, and air quality warnings can all push a start date back or pause a job partway through. A professional painter will tell you this upfront rather than promising a fixed date they cannot guarantee.
We always monitor the weather report closely and communicate anything necessary to our clients regarding the start date of their project, or if we need to pause a project in progress.
Communication During the Project
Communication should always be expected from a professional painter during a project. Typical communications should include the expected project start date, any updates during the project, and when they're expected to wrap up.
As the homeowner, it's important to know what's going on when you have a painting project underway. A couple of quick updates go a long way, and radio silence could be seen as a red flag.
The Final Walkthrough
Once everything is wrapped up, a good professional painter should always complete a quality control walkthrough of their work before considering the project truly complete. This is done to ensure everyone is on the same page and happy with the work, and there are no surprises that you have to chase back to fix.
A walkthrough means going through every surface we worked on, checking for consistency, missed spots, or anything that doesn't meet the standards of the finish level you chose.
Warranty and Peace of Mind
Every professional painter should have some sort of warranty or guarantee, as it's their safeguard behind their work. Our work is backed by a 1-year exterior warranty and 3-year interior warranty, which covers any deficiencies in our workmanship. If anything happens that's a result of our workmanship, we come back to fix it at no cost to you. This is one of
the biggest parts of hiring a professional painter that you don't get from DIYing.

Choosing the Right Painter For You
Choosing the right painter for your project can be stressful, as there are lots of different companies out there with lots of different pricing and ways of doing things. The most important thing is for the experience to be straightforward, not stressful.
You shouldn't be left guessing about pricing, timeline, or what's included, and you should be generally knowing what to expect. You should expect the job to be done in a professional, timely manner.
If you're planning an exterior painting project and want a team that communicates clearly, get in touch with us for a consultation. We'd love to help you bring your home's exterior back to life.


Comments