
Common Painting Mistakes to Avoid Before You Start Painting

Most homeowners feel confident tackling a DIY paint job (up to 66%!), but ask them to touch a roof or rewire an outlet and that confidence drops fast. Painting is oftentimes treated as the "easy" DIY project to do, but painting isn't as foolproof as it looks.
You've probably heard the coined term "landlord special" - it's a thing for a reason. We're often the first call for homeowners who had a DIY paint job go wrong, and after 15+ years of painting professionally, we've seen the same mistakes come up again and again. Here's the biggest, most common mistakes homeowners make when painting their home.
The most common, biggest painting mistakes to avoid
The biggest mistakes we see are: skipping surface prep, not testing for oil-based paint, choosing the wrong color or finish, using cheap materials, and ignoring the application recommendations from the manufacturer.
Let's deep dive into these and we'll explain how to avoid each.
Skipping surface prep
This is the biggest one. A good paint job is more prep than paint - often up to 60% of the total work is prep, not painting. Rushing or skipping prep entirely is one of the biggest reasons why paint jobs can fail or look bad early on.
Proper prep depends on the project and material type. This can include:
Typical prep for exterior painting projects:
Trenching, which is digging back any dirt that is starting to grow up on your siding, which ensures full coverage and prevents moisture issues
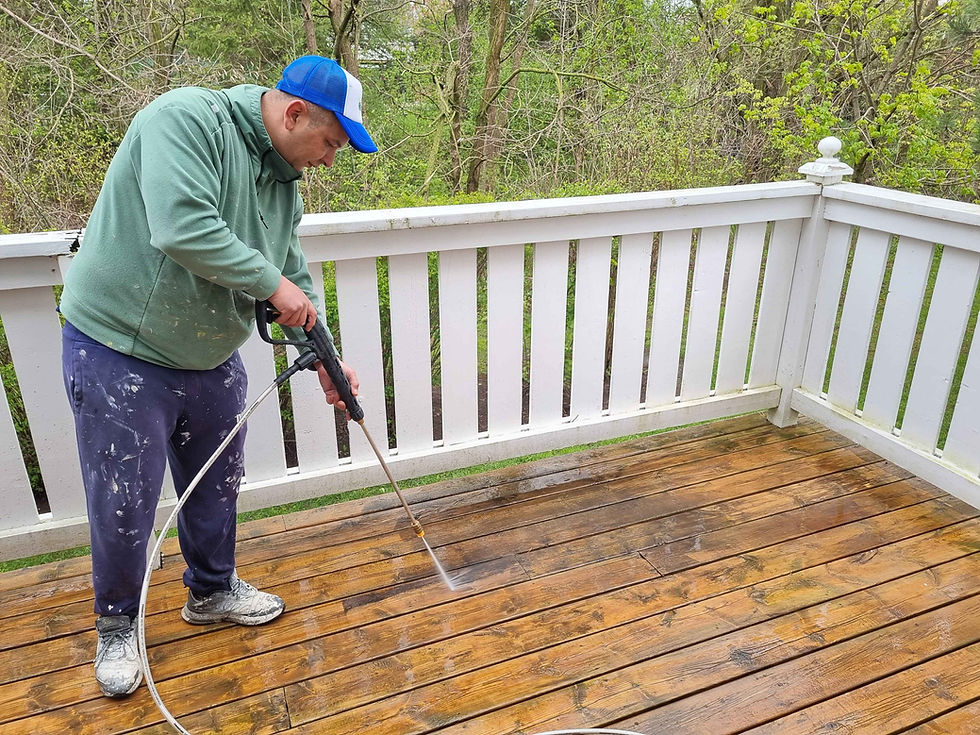
Power washing to remove old paint, debris, and dirt - common on siding or staining projects
For projects dealing with rust, the rust must be entirely sanded away, down to bare metal, and coated in a rust-inhibitive primer
For interior painting projects:
Washing interior walls or baseboards to remove dust, grease, and grime (paint cannot stick well to a dirty or greasy surface - you may need to use a degreaser of sorts if it's particularly bad, like near your oven)
Filling dents, holes, cracks with drywall compound, letting it dry and then sanding it smooth

For both project types:
Scraping and sanding any pre-existing peeling or failing paint back to a stable surface, so the paint has something to adhere to
Caulking gaps around trim, windows, and doors for aesthetics and seal things in; preventing moisture, damage and insects
Lightly sanding surfaces before painting so the new paint has something to adhere to
Back rolling after spraying to ensure optimal coverage of stain/paint or to mimic pre-existing textures

Not testing for oil-based paint
If you're painting over existing paint and you're not sure whether it's oil-based or latex, there's a quick test you'll want to do. It takes just five minutes - I promise - and it will save you the massive headache in the future if you accidently paint latex over oil.
See the photo on the left? This is a result of painting latex over oil: in this particular case, this 'symptom' is called alligatoring (the flaking you see).
This is unfortunately common, and it's very time-consuming to fix depending on the scale of the initial project.
When it comes to DIY painting projects, applying latex paint directly over oil-based paint without the right primer beforehand is one of the most common (and most expensive) mistakes a homeowner could make. It might look fine for weeks, or even months, but it will eventually peel, crack, or alligator, since the two paint types cannot bond to each other on their own.
The quick test: rub isopropyl alcohol on a cotton round over the existing paint. If paint comes off, it's latex and you can proceed with painting. If nothing comes off, it's oil-based and you must prime it with an oil-primer before painting over it with latex.
Skipping primer when it's needed
A lot of newer paints boast their built-in primer technology - paint and primer in one. While this is acceptable for most situations, there are a few situations where the separate application of primer is beneficial, and skipping it could risk the durability and longevity of your interior or exterior paint job.
Skipping primer is risky when:
You're painting over a drastically different color (particularly going from dark to light), which will take a lot of coats in paint without primer
You're painting over bare drywall, bare metal, bare wood, or a recently repaired drywall patch
You're covering oil-based paint with latex paint
The surface is glossy or stained
The surface has been exposed to (nicotine) smoke, which will require a stain/odor blocking primer
The surface has rusted, in which it will need to be sanded down to bare metal and a rust-inhibiting primer will need to be applied
Not testing your paint colors first
A color can look completely different in-store, on a swatch, or in the paint can, in comparison to on your walls. Lighting, wall texture, furniture, and the colors around it can all affect how a paint color actually reads in your space. Painting an entire room (or worse, an entire house!) without testing the color first and making sure you like it in all lightings is one of the most common regrets we hear about.
Avoid it entirely by utilizing color swatches, sample patches, and look at it during multiple times of day before committing. What looks perfect under store lighting can look completely different in your north-facing window at 4pm: here's why.
Choosing the wrong paint finish
Sheen matters a lot more than what people expect. A high-gloss finish will nearly highlight every imperfection on an imperfect wall, while flat finishes are notoriously more difficult to clean in a high-traffic area like a hallway or a children's room. Matching the finish to the room, to the condition of your walls, and to the vibe you want is just as important as matching the color.
Sometimes, homeowners can mistakenly buy a glossy sheen for their walls or ceiling. Unless done intentionally, it likely won't look good. It will highlight every imperfection on the wall, and it typically isn't the finish found on those surfaces.
Quick guide for choosing a finish:
Area | Paint Sheen Type | Worth Noting |
High-traffic areas (like stairwells or children's rooms) | Eggshell or satin is recommended; avoid flat or matte finishes because they aren't as washable | Think toddler hands dragging along the walls of your home - dirt and grime can discolor walls over time, requiring washing. This is why it's important to consider washability and durability. |
Low-traffic areas (like adult bedrooms or formal living rooms) | This is where a flat or matte finish can shine, as there is no risk with washability. | Flat or matte is best in rooms with low traffic, but you can choose eggshell or satin as well. |
Cabinets | Typically satin or semi-gloss are used. High-gloss can be used in designer spaces, but it requires skillful prep and application. | It's important to pick a sheen that suits your individual needs when it comes to cabinets. The glossier the sheen, the more durable it is and easier it is to wash, but it requires more surface prep in advance to ensure it looks good. |
Trim (baseboards, door frames, window frames, crown moulding, etc.) | Typically semi-gloss. | Trim can accumulate a lot of dust and dirt over time, which makes it important to choose an easily-washable finish like semi-gloss. |
Ceilings | Ceiling paint is usually flat. | Flat finishes are great at minimizing glare and texture, which is typically desired for ceilings. |
It's worth noting that for premium paint lines - like Sherwin Williams Emerald - the paint technology has improved for matte's washability, which means that it is significantly easier to wash matte paints than ever before. This means that you can gently wash matte surfaces without ruining the finish - however, you still can't scrub or over-wash areas.
Rushing dry time between coats
Painting over a coat before it's fully dry can cause peeling, uneven texture, or visible roller marks once it goes dry. Humidity and temperature both affect dry time, so even though the can might say it "dries in X amount of time", that doesn't mean it's true in every instance.
When in doubt, give it more time than you think it needs, especially between primer and your first top coat. It's also worth noting that some deck stains require 24 hours after coating to apply another coat. Make sure you always read the label and do your research before applying a product to avoid any issues.
Ignoring weather
If you're painting outside, rain, high humidity, and extreme heat can all affect how paint cures. Painting in conditions that are too hot, too cold, or too humid can lead to poor adhesion, blistering, or a finish that never cures properly. Painting during or before a big rain storm hits can lead to streaking and water drip marks on the finish. It's always worth checking the forecast before starting an exterior project.
Painting in Ontario
In Ontario, temperatures have been getting hotter and hotter every year. During heat wave temperatures, it is not recommended to apply paint, as most paints have an upper-limit of what temperature they should be applied in. As a good general practice, you should try to never paint in direct sun.

Buying cheap materials to save money
Lower-quality paint, brushes, and rollers usually mean more coats needed, less even coverage, and a finish that might not last as long. This doesn't mean you need the most expensive product on the shelf, but skimping on materials to save a bit upfront is one of the most common ways a paint job ends up costing more in the long run.
Typically, lower quality paint applies like milk in comparison to the paint we typically use. This means more coats and it's more likely to show brush strokes and unevenness, which can prove difficult for a DIY homeowner. We talked about the difference between cheap and expensive paint here.
For rollers and brushes, cheaper options typically shed hairs into the paint which makes for a frustrating painting experience.
Underestimating physical work
Painting is more physically demanding than it looks, especially once ladders, extension poles, or multiple stories are involved. It's easy to underestimate how tiring it is to be on your feet, reaching overhead, and sanding at odd angles can be.
It is never fun to hear that a client previously attempted to paint and hurt their back in the process, in which they now require our services to finish the project up. Unfortunately, this has happened more than once.
Take frequent breaks, make sure to stretch, and always be mindful of how you are positioning your body. Use the proper tools to get the job done without breaking your back - such as utilizing pole sanders, extension poles for rollers, and orbital sanders.
If your project involves working at heights, steep rooflines, or anything beyond a single-storey ladder, it's worth being honest with yourself about whether it's a DIY job, or best left for a professional crew with the right safety and training. In Ontario, painters working at heights are required to be Working at Heights certified for exactly this reason.
How to fix these painting mistakes
Thankfully, most of these mistakes can be fixed. For most projects, you're looking at removing any form of damage, getting it back to a sound surface, and repainting.
If applicable: scrape away any peeling, flaking paint
If applicable: patch any nail or screw holes, dings, dents, etc. with drywall compound, sanding it smooth afterwards
Sand any uneven areas, with a scuff-sand on the entire surface to promote adhesion
If applicable: prime the area before painting (relevant if: the paint color isn't covering well enough, if painting latex over oil, if painting over water damage on ceilings, or if you're painting over nicotine/smoke damage.)
Repaint with at least 2 coats afterwards (it may require more - in situations like if you are trying to block out a stain from water damage or nicotine, or choosing a color that doesn't cover well.)
However, each project is different and will likely require different steps. It's important to do your research to ensure that what you're doing is the recommended course of action for remedying a DIY paint job fail - or, call a professional.
Frequently Asked Questions
What are the most common painting mistakes to avoid? Skipping surface prep, painting over unwashed or glossy walls, skipping primer, not testing colors first, and rushing dry time between coats are the mistakes we see most often - and they're also the ones most likely to cause a paint job to fail early.
What are signs of a bad paint job? Visible roller or brush marks, uneven coverage or patchiness, peeling or bubbling, and paint that feels tacky long after it should be dry are all signs of a paint job that wasn't prepped or applied properly.
Can you sand back mistakes when painting walls? In many cases, yes. Drips, roller texture, and minor imperfections can often be sanded smooth once the paint has fully dried, then touched up or recoated. More significant issues, like peeling from a latex-over-oil mistake, usually require scraping and sanding back to a stable surface before repainting.
What are the most common painting mistakes DIYers regret? Not testing the color before painting the whole room, skipping prep work to save time, and underestimating how much prep a room actually needs are the regrets we hear about most.
Want It Done Right the First Time?
Painting is one of those projects that looks simple until you're a few hours in and realize how much prep actually goes into a lasting result. If you'd rather skip the trial and error, reach out to us for a consultation. We'll walk you through exactly what your space needs, so you get it right the first time.


Comments